Phone:
0086-757-8938 9313
Email:
Address:
Caochang Industrial Zone, Liguang Rd, Lishui, Nanhai, Foshan, Guangdong, China
24/7 Online Services
Phone:
0086-757-8938 9313
Email:
Address:
Caochang Industrial Zone, Liguang Rd, Lishui, Nanhai, Foshan, Guangdong, China
24/7 Online Services
Ah, the beach! The sun shining down on the sparkling sand, the soothing sound of crashing waves, and that refreshing sea breeze – there’s nothing quite like it. But before you can fully immerse yourself in this coastal paradise, there’s one crucial detail to sort out: setting up your beach flag. Fret not, fellow beach enthusiasts! We’re here to help you navigate this task with ease so you can spend less time wrestling with poles and ropes, and more time enjoying the sun, surf, and sand. As seasoned experts in all things beach-related, we’ve put together a simple yet comprehensive guide that will have your beach flag flying high in just minutes. So grab your sunscreen and favorite pair of flip-flops – let’s dive right into making your next beach day a breeze!
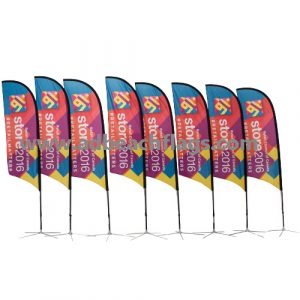
When it comes to choosing the right beach flag, there are a few key factors you need to consider. To make an informed decision, it’s essential to understand the different types of beach flags available and what factors play a role in determining the best option for your needs.
There are several types of beach flags, each with its own unique features and benefits. Here are some common options:
Once you’ve familiarized yourself with the different types of beach flags, it’s time to consider some important factors that will help you choose the best one for your needs:
By keeping these factors in mind while shopping for a beach flag, you’ll be able to find the perfect option that meets your needs and enhances your beach experience.
There are several types of beach flags available on the market, each with its own unique features and benefits. Understanding the differences between them will help you choose the perfect flag for your needs.
When selecting the right beach flag type for your needs, consider factors such as visibility, wind resistance, and overall aesthetic appeal based on your intended use and location.
When buying a beach flag, there are several important factors to consider to ensure you get the best product for your needs. Keep these factors in mind as you shop:
1. Material: The material of your beach flag should be durable and weather-resistant to withstand outdoor conditions. Polyester is a popular choice due to its strength and resistance to fading. Look for flags made from high-quality polyester fabric that can endure strong winds and sun exposure.
2. Size: Beach flags come in various sizes, so consider the space available and the visibility needed for your flag. Larger flags may catch more attention from a distance but require more space and stronger support systems.
3. Design: Choose a design that represents your brand or message effectively. You can opt for single-sided or double-sided prints, with single-sided being more cost-effective but less visible from all angles compared to double-sided prints.
4. Print Quality: A high-quality print ensures that your design stands out and remains vibrant over time. Look for flags with digital printing techniques that produce sharp, clear images with long-lasting colors.
5. Customization Options: Some manufacturers offer custom designs, allowing you to create a unique beach flag tailored to your specific needs. Consider whether you want a fully customized design or if a pre-designed template will suffice.
6. Pole System: The pole system is crucial for the stability of your beach flag. Opt for poles made from fiberglass or aluminum, as they are lightweight yet sturdy materials that resist rusting and corrosion.
7. Ease of Assembly & Disassembly: A user-friendly setup process saves time and effort when setting up or taking down your beach flag. Look for products with simple assembly instructions and minimal tools required.
8. Price & Warranty: Finally, consider the price of the beach flag within your budget constraints, while also factoring in any warranties or guarantees offered by the manufacturer. A good warranty can provide peace of mind that your investment is protected against defects and damages.
By considering these factors, you’ll be able to find a beach flag that meets your requirements and offers an attractive, sturdy solution for your outdoor advertising or event needs.
To set up your beach flag quickly and efficiently, it’s essential to have the right tools and accessories on hand. This will not only make the process smoother but also ensure that your flag remains secure in various conditions. Here’s a list of items you’ll need:
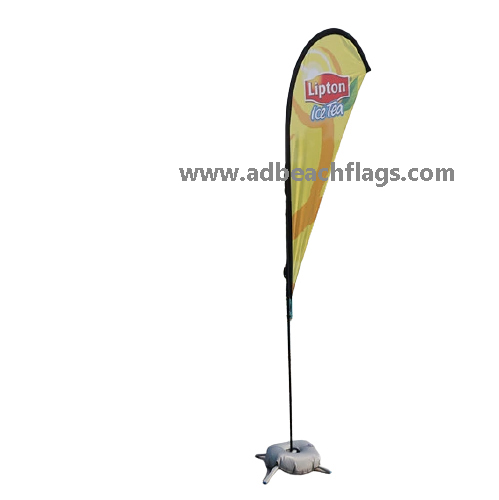
The most crucial components of your beach flag setup are the poles and bases. There are different types of poles available, such as telescopic poles, sectional poles, or pre-assembled poles. Choose one that best suits your needs and is compatible with your flag.
For bases, there are several options to choose from:
Make sure to select a base that’s suitable for the surface where you’ll be setting up your beach flag.
To further secure your beach flag in place, especially during windy conditions, consider using sandbags or stakes. Sandbags can be filled with sand or other heavy materials and placed over the base to add weight and stability. Stakes can be used in conjunction with ground spikes or sand anchors to create additional anchorage points.
A good-quality carrying case will make it much easier to transport all of your tools and accessories to and from the beach. Look for one that has separate compartments for each item (poles, bases, stakes, etc.) as well as padding to protect them from damage during transit.
By gathering all of these necessary tools and accessories beforehand, you’ll be well-prepared to set up your beach flag in just minutes!
To set up your beach flag easily and securely, it’s essential to have the right poles and bases. These components play a crucial role in maintaining stability and ensuring that your flag remains upright throughout the day.
There are various types of poles available for beach flags, including fiberglass, aluminum, and carbon fiber. Fiberglass poles are lightweight, flexible, and durable, making them a popular choice for many beachgoers. Aluminum poles are also lightweight and sturdy but may not be as flexible as fiberglass options. Carbon fiber poles offer the best of both worlds, providing strength, flexibility, and durability; however, they can be more expensive than other options.
When selecting a pole for your beach flag, consider factors such as:
Next up is choosing the right base for your beach flag setup. Bases come in different styles to accommodate various surfaces:
When selecting a base for your beach flag, consider factors such as:
By carefully selecting the right poles and bases for your beach flag, you’ll be well on your way to a hassle-free setup experience.
When it comes to securing your beach flag, sandbags and stakes are essential accessories that will provide stability and prevent your flag from falling over or being blown away by the wind. In this section, we’ll discuss their importance and how to use them effectively.
Sandbags are weighted bags designed to be filled with sand or other heavy materials to anchor your beach flag. They come in various sizes and materials such as nylon, polyester, or canvas. The key is to choose a durable material that can withstand harsh outdoor conditions. To use a sandbag:
Stakes, on the other hand, are long metal or plastic rods that are driven into soft surfaces like sand or soil to secure your beach flag in place. They typically have a pointed end for easy insertion and a loop or hook at the top for attaching ropes or bungee cords connected to your beach flag pole. To use stakes:
In some cases, you might need both sandbags and stakes for added security, especially when setting up on uneven terrain or during windy conditions.
Remember that properly securing your beach flag is crucial to ensure its longevity and prevent accidents. By using sandbags and stakes effectively, you can enjoy a worry-free day at the beach with your eye-catching flag waving proudly in the breeze.
A carrying case is an essential accessory for your beach flag setup, as it helps protect and transport all the components with ease. When choosing a carrying case, you’ll want to consider its material, size, and compartments to ensure it meets your needs.
First and foremost, look for a carrying case made of durable materials that can withstand wear and tear from frequent use. Nylon or polyester cases are common options, as they are lightweight yet strong enough to handle the weight of poles, bases, sandbags, stakes, and flags.
The size of the carrying case should be large enough to accommodate all of your beach flag components. Measure the length of the disassembled poles and check the dimensions of the bases to ensure that they will fit comfortably inside the case. It’s also a good idea to choose a carrying case with adjustable straps so you can easily carry it on your shoulder or as a backpack.
To keep everything organized and easy to access during setup or takedown, opt for a carrying case with multiple compartments or pockets. This will allow you to separate different pieces like poles from bases or sandbags from stakes. Some cases may even have specific slots designed for each component type.
Lastly, consider any additional features that may be useful for your specific needs. For instance, some carrying cases come with built-in wheels for easier transportation across long distances or uneven terrain. Others may have exterior pockets for extra storage space or even include a small repair kit in case of emergencies.
By selecting a high-quality carrying case that fits all your beach flag components comfortably and securely while offering convenient transportation options, you’ll be able to set up your beach flag in minutes without any hassle.
Setting up your beach flag can be a breeze if you follow these simple steps. In just a few minutes, you’ll have a colorful and eye-catching display to promote your business or event.
First, carefully unfold the flag from its storage case or bag. Make sure to smooth out any wrinkles or creases in the fabric to ensure that your design is clearly visible. If necessary, use an iron on low heat to remove any stubborn wrinkles.
Next, it’s time to assemble the pole that will support your beach flag. Most poles come in multiple sections that easily connect together. Start by connecting the bottom section of the pole to the middle section, and then attach the top section last. Make sure each connection is secure and tight before moving on to the next step.
Now that your pole is assembled, it’s time to attach your flag. Depending on your beach flag type, there may be different methods for attaching it:
Make sure that your flag is pulled taut once attached so that it can catch wind easily and display correctly.
With these three easy steps completed, you’re now ready to move onto securing your beach flag in place! Remember always practice caution when setting up your beach flag, especially in windy conditions or crowded areas.
To begin setting up your beach flag, start by unfolding the flag from its storage. Carefully remove it from the carrying case or packaging and lay it out flat on a clean surface. This will help you identify any wrinkles or creases that may need to be smoothed out before attaching it to the pole. If needed, use a fabric steamer or an iron on a low heat setting to gently remove any stubborn wrinkles.
Next, take a moment to inspect the flag for any potential damage, such as tears or frayed edges. If you notice any issues, address them promptly with fabric glue or needle and thread to ensure your flag is in optimal condition for display.
Once your flag is smooth and free of any defects, locate the sleeve or grommets that are designed for attaching the flag to the pole. Sleeves are typically found along one side of the flag, while grommets are small metal rings that may be present at each corner. Familiarize yourself with these attachment points, as they will play a crucial role in securing your beach flag during assembly.
With your beach flag unfolded and ready for action, you can now proceed to the next step – assembling the pole!
To assemble the pole for your beach flag, start by laying out all the pole sections on a flat surface. This will help you visualize how each piece fits together and ensure you have all necessary components. Typically, beach flag poles are made up of several interlocking sections that allow for easy assembly and disassembly.
Next, identify the bottom section of the pole, which is usually thicker and sometimes has a metal tip or spike at the end. This part will be inserted into the base to provide stability to your beach flag.
Now it’s time to connect the pole sections. Begin by inserting one end of a section into another, making sure they fit snugly together. For some poles, you may need to twist the sections slightly until they lock in place. Continue connecting each piece until all sections are securely joined.
If your beach flagpole has a flexible top section, make sure it is correctly positioned at the top of the assembled pole. This bendable part allows your flag to wave freely in the wind without getting tangled around the pole.
Once your pole is fully assembled, check for any loose connections or misaligned pieces, and make any necessary adjustments. It’s essential to have a strong and stable assembled pole before attaching your flag and setting it up on various surfaces.
In summary, assembling your beach flagpole involves laying out all sections, identifying the bottom piece, connecting each section securely, ensuring proper placement of flexible parts if applicable, and checking for stability before moving on to attaching your flag. With these simple steps in mind, you’ll have an expertly assembled beach flagpole in no time!
Attaching the flag to the pole is an essential step in setting up your beach flag. It’s crucial to ensure that the flag is properly secured and displayed to achieve maximum visibility. Here’s a step-by-step guide on how to do it:
By following these steps, you’ll have successfully attached your beach flag to its pole and be ready to move on to securing it in place on various surfaces. Remember that proper attachment ensures not only a great-looking display but also safety and stability for your flag throughout its use.
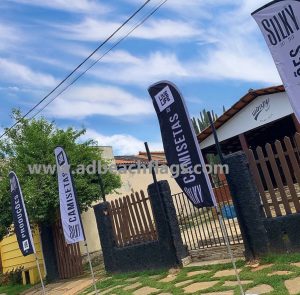
Securing your beach flag on different surfaces is crucial for stability and visibility. No matter where you plan to set up, it’s essential to know the proper techniques to ensure a safe and sturdy installation. In this section, we’ll discuss how to secure your beach flag on sand, grass or soil, and hard surfaces.
Sand can be a tricky surface for setting up beach flags due to its shifting nature. Follow these steps for a stable setup:
Grass and soil offer more stability than sand but still require proper anchoring techniques:
Hard surfaces like concrete or asphalt require different anchoring methods:
By following these guidelines, you can easily secure your beach flag on various surfaces, ensuring a safe and sturdy setup that will last throughout your event or promotion.
Setting up your beach flag on sand can be a breeze if you follow these simple steps. Since sand is a loose and shifting surface, it’s essential to ensure that your flag stays securely in place throughout the day. Here’s how you can do just that:
1. Choose the right base: For sandy surfaces, it’s best to use a spiral or screw-in ground stake specifically designed for this purpose. These stakes provide excellent stability by anchoring themselves deep into the sand.
2. Find a suitable spot: Look for an area with relatively flat and even sand to set up your beach flag. Avoid areas too close to the waterline, as the incoming tide may cause your flag to topple over.
3. Insert the ground stake: Hold the stake at an angle of about 45 degrees and twist it clockwise into the sand until only its top loop remains visible. Ensure that it’s firmly secured before proceeding.
4. Attach the pole to the base: Slide the bottom end of your assembled pole into the loop on top of the ground stake, making sure it fits snugly.
5. Secure with sandbags (optional): If you’re expecting strong winds or want extra stability, place one or two sandbags around the base of your beach flag pole. This will help weigh down and anchor your setup further.
6. Monitor regularly: Throughout your time at the beach, keep an eye on your flag and make any necessary adjustments if you notice any signs of instability or loosening.
By following these steps, you’ll have no trouble setting up and enjoying your beach flag on sandy surfaces all day long!
Setting up your beach flag on grass or soil is a slightly different process compared to sand, but it’s still quick and easy. Just follow these steps to ensure your flag is secure and stable:
By following these steps, you can easily set up your beach flag on grass or soil surfaces in just a few minutes. Remember to always monitor the weather conditions and adjust your setup as needed to ensure your flag remains stable and secure throughout the day.
Setting up your beach flag on hard surfaces can be a bit more challenging than on sand or grass, but with the right tools and techniques, you’ll have it standing tall in no time. Here’s how to do it:
By following these steps, you’ll have your beach flag set up on a hard surface in minutes, ready to attract attention and make a statement. Remember to always prioritize safety and stability when setting up your flag on any surface.
Taking down and storing your beach flag properly is essential to ensure its longevity and maintain its appearance. By following these simple steps, you can disassemble, fold, and store your beach flag with ease.
By following these steps for taking down and storing your beach flag after each use, you’ll be able to maintain its appearance and ensure it lasts for many beach outings to come. Remember, proper care and storage are essential to keep your beach flag looking great and functioning well.
To ensure a smooth and hassle-free experience when it’s time to pack up, disassembling the pole is an important step that shouldn’t be overlooked. By following these simple steps, you’ll have your beach flag pole taken apart and ready for storage in no time.
By following these steps, you’ll be able to efficiently disassemble your beach flag pole without causing any damage or unnecessary wear on its components. Proper disassembly and storage will ensure that your beach flag remains in excellent condition and ready for future outings at a moment’s notice!
Properly folding and storing your beach flag is essential to maintain its longevity and keep it looking fresh for every use. Follow these easy steps to ensure your flag stays in great condition:
By following these simple steps for folding and storing your beach flag properly, you’ll ensure it remains vibrant and eye-catching for many beach outings to come!
In conclusion, setting up your beach flag can be a hassle-free and efficient process if you follow the right steps. First, be sure to choose the perfect flag by understanding the various types available and considering factors such as size, material, and design. Next, gather all necessary tools and accessories like poles, bases, sandbags or stakes, and a carrying case for easy transportation.
Assembling your beach flag is as simple as unfolding it, putting together the pole, and attaching the flag securely. When it comes to securing your beach flag on different surfaces such as sand, grass or soil, or hard surfaces like concrete or asphalt – adapt accordingly with appropriate accessories to ensure stability.
Finally, taking down and storing your beach flag is just as important as setting it up. Properly disassemble the pole and fold your flag carefully before placing them in their respective storage cases. This not only prolongs the life of your beach flag but also makes it easier for future use.
By following these easy-to-understand steps and tips from our expert guide on “How to Set Up Your Beach Flag in Minutes,” you’ll be well-equipped to make a statement at any beach event or outdoor occasion. So go ahead – show off your brand or message with pride while enjoying fun in the sun.
Need beach flags for your brand advertising and promotion? Contact us now by CLICK or fill in below blanks or WhatsApp.